Materials:
- Perforated PVC pipes (quantity: 3, length: 10 feet each)
- Gravel (1.5 tons)
- Landscape fabric (1 roll, 100 square feet)
- Shovel
- Tape measure
- Level
- Water hose
DIY Steps:
-
Site Selection: Choose a location with suitable soil characteristics and proper distance from buildings and water sources.
-
Perk Test: Conduct a percolation test to determine soil absorption rate and design the drain field accordingly.
-
Layout Planning: Mark the area for the drain field, ensuring it fits the recommended dimensions based on household size.
-
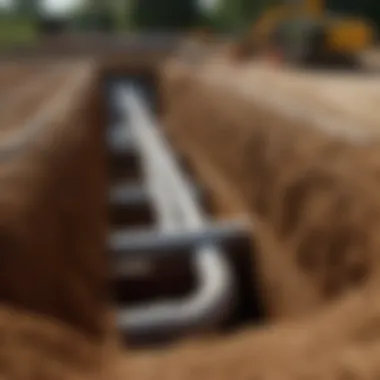
Excavation: Dig trenches to place the perforated PVC pipes, following a specific slope and depth for optimal wastewater distribution.
-
Pipe Installation: Lay the PVC pipes in the trenches, ensuring they are level and properly aligned for consistent drainage.
-
Cover Pipes: Fill the trenches with gravel to cover the pipes, allowing proper filtration and absorption of wastewater.
-
Landscape Fabric: Place a layer of landscape fabric on top of the gravel to prevent soil intrusion and maintain the drain field's integrity.
-
Final Covering: Backfill the trenches with soil, carefully compacting it to avoid settling and ensuring proper distribution of effluent.
Technical Aspects:
- Tools: Shovel, tape measure, level
- Timing: Plan installation during dry weather to facilitate proper soil compaction and avoid water saturation.
- Critical Techniques: Ensure proper pipe alignment, consistent slope, and adequate gravel coverage to prevent clogging and ensure long-term functionality.
DIY Project Process:


-
Excavate Trenches: Start by digging trenches according to the planned layout, maintaining precise dimensions and slope angles.
-
Pipe Placement: Carefully place the perforated PVC pipes in the trenches, ensuring they are evenly spaced and securely positioned.
-
Gravel Bedding: Fill the trenches with gravel around the pipes, creating a stable base for water distribution and filtration.
-
Fabric Placement: Install the landscape fabric over the gravel bed to provide a barrier against soil intrusion and preserve the drain field's effectiveness.
-
Backfilling: Cover the gravel and fabric with soil, compacting it layer by layer to promote proper settling and drainage.
Troubleshooting Tips:


-
If drainage issues arise, check for clogs in the pipes or gravel, and ensure proper slope and soil compaction for efficient wastewater percolation.
-
Monitor the drain field periodically for signs of saturation or standing water, which may indicate a need for maintenance or adjustments.
Introduction


In the realm of septic system construction, the drain field stands as a pivotal component that significantly impacts the system's efficiency and longevity. A vital element to grasp for any homeowner or housewife involved in property management, the construction of an effective drain field ensures the seamless percolation of wastewater into the soil, thereby safeguarding the environment and promoting the well-being of occupants and the community as a whole. Understanding the intricacies and best practices of establishing a robust drain field is imperative to prevent issues such as water contamination, foul odors, and system malfunctions, which could lead to costly repairs and environmental hazards. By delving into the specifics of designing and implementing a high-functioning drain field, individuals can not only guarantee the optimal performance of their septic system but also contribute to the sustainability and health of their surroundings.
Overview of a Drain Field
The foundational pillar of a septic system, the drain field, also known as a leach field or absorption field, serves a critical function by facilitating the dispersal and purification of effluent from the septic tank through natural microbial processes. This below-ground network of perforated pipes and gravel beds acts as a secondary treatment stage where the organic matter in the wastewater is naturally decomposed and filtered before it seeps into the underlying soil, completing the purification cycle. The key objective of a drain field is to ensure the efficient distribution and absorption of treated wastewater, allowing for proper filtration and preventing the groundwater or surface water contamination that could result from a malfunctioning or inadequately constructed system.
Emphasizing the significance of maintaining the integrity and functionality of the drain field cannot be overstated, as any oversight or negligence in its construction could lead to detrimental consequences such as sewage backups, system failure, and environmental pollution. To this end, homeowners and housewives embarking on the journey of constructing a drain field must acquaint themselves with the essential aspects of site evaluation, sizing, layout design, material selection, installation techniques, and post-construction care to guarantee a robust and enduring septic system that aligns with regulatory standards and environmental requirements.
Planning and Design
When it comes to the construction of an efficient drain field for a septic tank, the planning and design stage are crucial in ensuring the long-term functionality and sustainability of the system. Proper planning and designing not only contribute to effective wastewater treatment but also help in preventing potential issues that may arise in the future.
The Planning and Design section of this article delves into the intricate process of evaluating the site and conducting percolation tests to determine the optimal location for the drain field. This section also focuses on the critical aspects of sizing and layout, emphasizing the importance of correctly determining the drain field size and designing a layout that facilitates even distribution of wastewater.
Site Evaluation and Percolation Test
Determining Suitable Location
Performing a thorough assessment of the site allows for the identification of potential challenges or restrictions that may impact the effectiveness of the drain field. Factors such as slopes, tree roots, and existing structures can influence the suitability of a location, highlighting the importance of meticulous site evaluation.
Performing Soil Percolation Test
The soil percolation test is a fundamental step in the planning and design of a drain field as it helps determine the soil's ability to absorb wastewater effectively. By conducting this test, homeowners can assess the rate at which water infiltrates the soil, indicating its suitability for accommodating the effluent from the septic tank.
The percolation test involves creating test holes, filling them with water, and observing the time it takes for the water to percolate into the soil. This data is essential for designing an appropriately sized drain field that matches the soil's percolation capabilities, ensuring efficient wastewater treatment.
Sizing and Layout
Determining Drain Field Size
Determining the correct size of the drain field is a critical aspect of the planning and design process for a septic system. The size of the drain field is determined based on factors such as the household size, water usage, soil percolation rate, and local regulations.
Properly sizing the drain field ensures that it can accommodate the volume of wastewater produced by the household and allows for adequate dispersion and filtration of the effluent. Oversized or undersized drain fields can lead to operational issues and environmental concerns, underscoring the importance of accurate sizing.
Designing Layout for Even Distribution
The design of the drain field layout plays a significant role in achieving uniform distribution of wastewater across the absorption area. By planning a layout that promotes even effluent distribution, homeowners can prevent overloading of specific sections of the drain field, thereby extending its lifespan and optimizing performance.
Design considerations such as the arrangement of perforated pipes, slope of the terrain, and distance between trenches contribute to ensuring equal distribution of wastewater throughout the drain field. Implementing a well-thought-out layout design enhances the overall efficiency of the septic system and minimizes the risk of premature failure.
Construction Process
In the construction process of a drain field for a septic tank, meticulous attention to detail is crucial for the long-term efficiency and functionality of the system. Each step plays a vital role in ensuring proper wastewater percolation into the soil and minimizing environmental impacts. From excavation to final covering, every aspect requires precision and adherence to best practices to create a reliable drain field.
Excavation and Preparation
Digging Trenches
Digging trenches is a critical initial step in constructing a drain field. These trenches provide the pathways for wastewater to flow through and eventually seep into the surrounding soil. It is essential to dig the trenches at the appropriate depth and width to accommodate the perforated pipes. The trenches must be carefully planned to ensure even distribution of effluent and prevent clogging over time.
Clearing and Leveling the Area
Clearing and leveling the area where the drain field will be installed is equally important. This process allows for a smooth surface on which to lay the drain lines and promotes proper drainage. By removing obstructions and ensuring a level base, you create optimal conditions for the efficient functioning of the septic system. Proper grading of the area aids in water movement and prevents stagnant pools that could hinder the percolation process.
Laying Perforated Pipes
Selecting Pipe Materials
The choice of pipe materials for the drain field is crucial to its durability and longevity. High-density polyethylene (HDPE) pipes are commonly used due to their resistance to chemicals and abrasion. These pipes are also flexible, making them easier to install in varying soil conditions. HDPE pipes are a popular choice for their longevity and low maintenance requirements, essential factors for a reliable drain field.
Proper Installation Techniques
Proper installation techniques for laying perforated pipes involve correct positioning and alignment to ensure uniform effluent distribution. The pipes need to be placed accurately within the trenches at the specified gradient to facilitate gravitational flow of wastewater. Securing the pipes in place and connecting them effectively is essential to prevent leaks or blockages that could compromise the drain field's performance.
Backfilling and Covering
Adding Gravel and Soil Layers
Adding gravel and soil layers on top of the laid pipes serves multiple purposes. The gravel promotes drainage by providing a stable medium for effluent dispersion and reducing soil compaction. The soil layers above the gravel help to further filter and distribute wastewater into the underlying ground. Proper compaction of the backfill materials is key to maintaining the structural integrity of the drain field.
Providing Adequate Cover
Providing adequate cover to the drain field is crucial for protecting the system from external elements and ensuring its functionality. A sufficient layer of soil acts as a barrier between the pipes and the surface, preventing damage and facilitating natural filtration processes. Adequate cover also helps in maintaining temperature and moisture levels necessary for optimal bacterial action in breaking down the effluent.
Post-Construction Care
Maintenance Practices
Regular Inspections
Regular inspections are a fundamental component of post-construction care for a septic tank drain field. These inspections involve visually assessing the drain field, checking for any signs of clogging, standing water, or odors that may indicate potential issues. Conducting regular inspections allows homeowners to detect problems early on, thereby avoiding more significant damage to the septic system.
Regular inspections contribute significantly to the overall health of the septic system by providing early intervention in case of any problems. The key characteristic of regular inspections is their proactive nature, helping to identify issues before they escalate into costly repairs. This practice is highly beneficial for maintaining the efficiency and functionality of the drain field, ensuring smooth wastewater percolation and preventing system failures.
Preventative Measures
Implementing preventative measures is another crucial aspect of post-construction care for a septic tank drain field. By taking proactive steps to prevent damage and deterioration, homeowners can enhance the longevity of their septic system. Preventative measures may include avoiding planting trees or shrubs near the drain field, refraining from dumping harmful chemicals down the drains, and being mindful of excess water usage.
Preventative measures are a popular choice for homeowners looking to safeguard their septic systems against premature failure. The key characteristic of preventative measures is their focus on proactive maintenance to prevent avoidable issues. By adopting preventative measures, homeowners can mitigate the risk of drain field malfunctions, ensuring the continued proper functioning of their septic system.


